- 1 Post
- 45 Comments

You can use most of the connectors you would use for bigger wires. Wago lever nuts are rated for conductors as small as 0.14 mm².
If you want something to fit a din rail, standard terminal blocks (something like this) should also work.

Alt text:
ISO 8601 was published on 06/05/88 and most recently amended on 12/01/04.


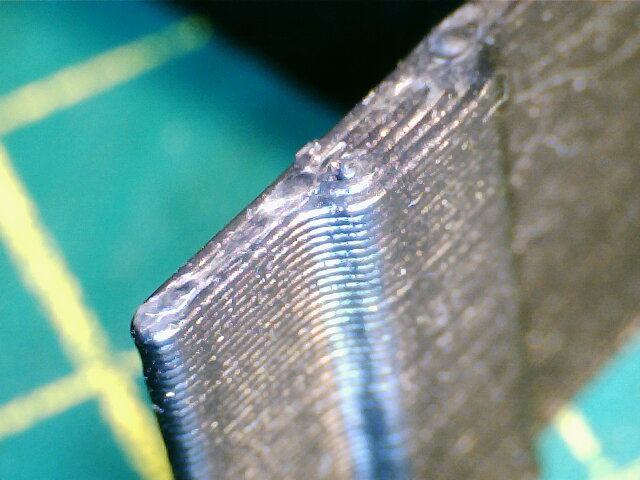
From the IRF1404Z data sheet:
Calculated continuous current based on maximum allowable junction temperature. Bond wire current limit is 120A. Note that current limitations arising from heating of the device leads may occur with some lead mounting arrangements.
You need to design the PCB so that the heat from the legs can be properly dissipated, or they won’t live up to the rated current.
Also, traces on a PCB are much thinner than those legs. A trace with the same cross-sectional area would be impractically wide.
If you can wait a couple weeks, AliExpress is going to be the cheapest.
eBay may be a bit more expensive, but it’s often my go-to because you can find everything and usually there are options with short shipping times.
For not too obscure parts, I would look at Reichelt, their prices are surprisingly low (especially if you bundle your orders to save on shipping costs).

HiPER Calc Pro. A great scientific calculator I use constantly. (There is also a unpaid, ad-supported version, and the ads weren’t too intrusive the last time I tried it)
That’s probably not a bad idea, although I doubt it will make much of a difference. But since you’re redesigning the whole thing, might as well do it.
It looks like you would want an even airflow through the whole PSU. The main heat-generating components are using the sides of the housing as a heat sink. I’m guessing the fan is mostly so the air inside the housing doesn’t get too warm, not to cool individual components.
Where is the original air exhaust? If it’s near the bottom of the picture, that would confirm my theory. In that case, I would keep the fan placement as close to original as possible (i.e. the blue square).
You can use a boost converter to boost the 5V of an USB port to the 19V your notebook needs.
Assuming 5A output from a powerbank (which is probably about the max you will get without USB PD), you could theoretically get 0.55A at 19V. With the unavoidable inefficiencies, you will get less.
So, maybe enough to very slowly charge your notebook while it’s off. But when it’s turned on, the battery charge will still drop.
Sure, the skull is biodegradable. But didn’t you know that large-scale human farming is responsible for the vast majority of CO2 emissions?!

This seems to be a bug in the slicer. I’m seeing the same issue in OrcaSlicer if the skirt height is set to more than one layer (even if the skirt is disabled). This makes sense if a skirt is used (can’t print a continuous spiral if you have to switch between printing the object and the skirt), but not if it’s disabled.
What slicer are you using? If it’s a PrusaSlicer fork, this is likely the same bug.

From a cursory read of the datasheet, using the “dead time control” pin seems to be the way to go. Basically, this pin is used to set the voltage, while the error amplifier inputs (that’s the closest function to “over current protection” this chip has) are used to adjust the output according to the load. For your application, you probably don’t need to use them at all.
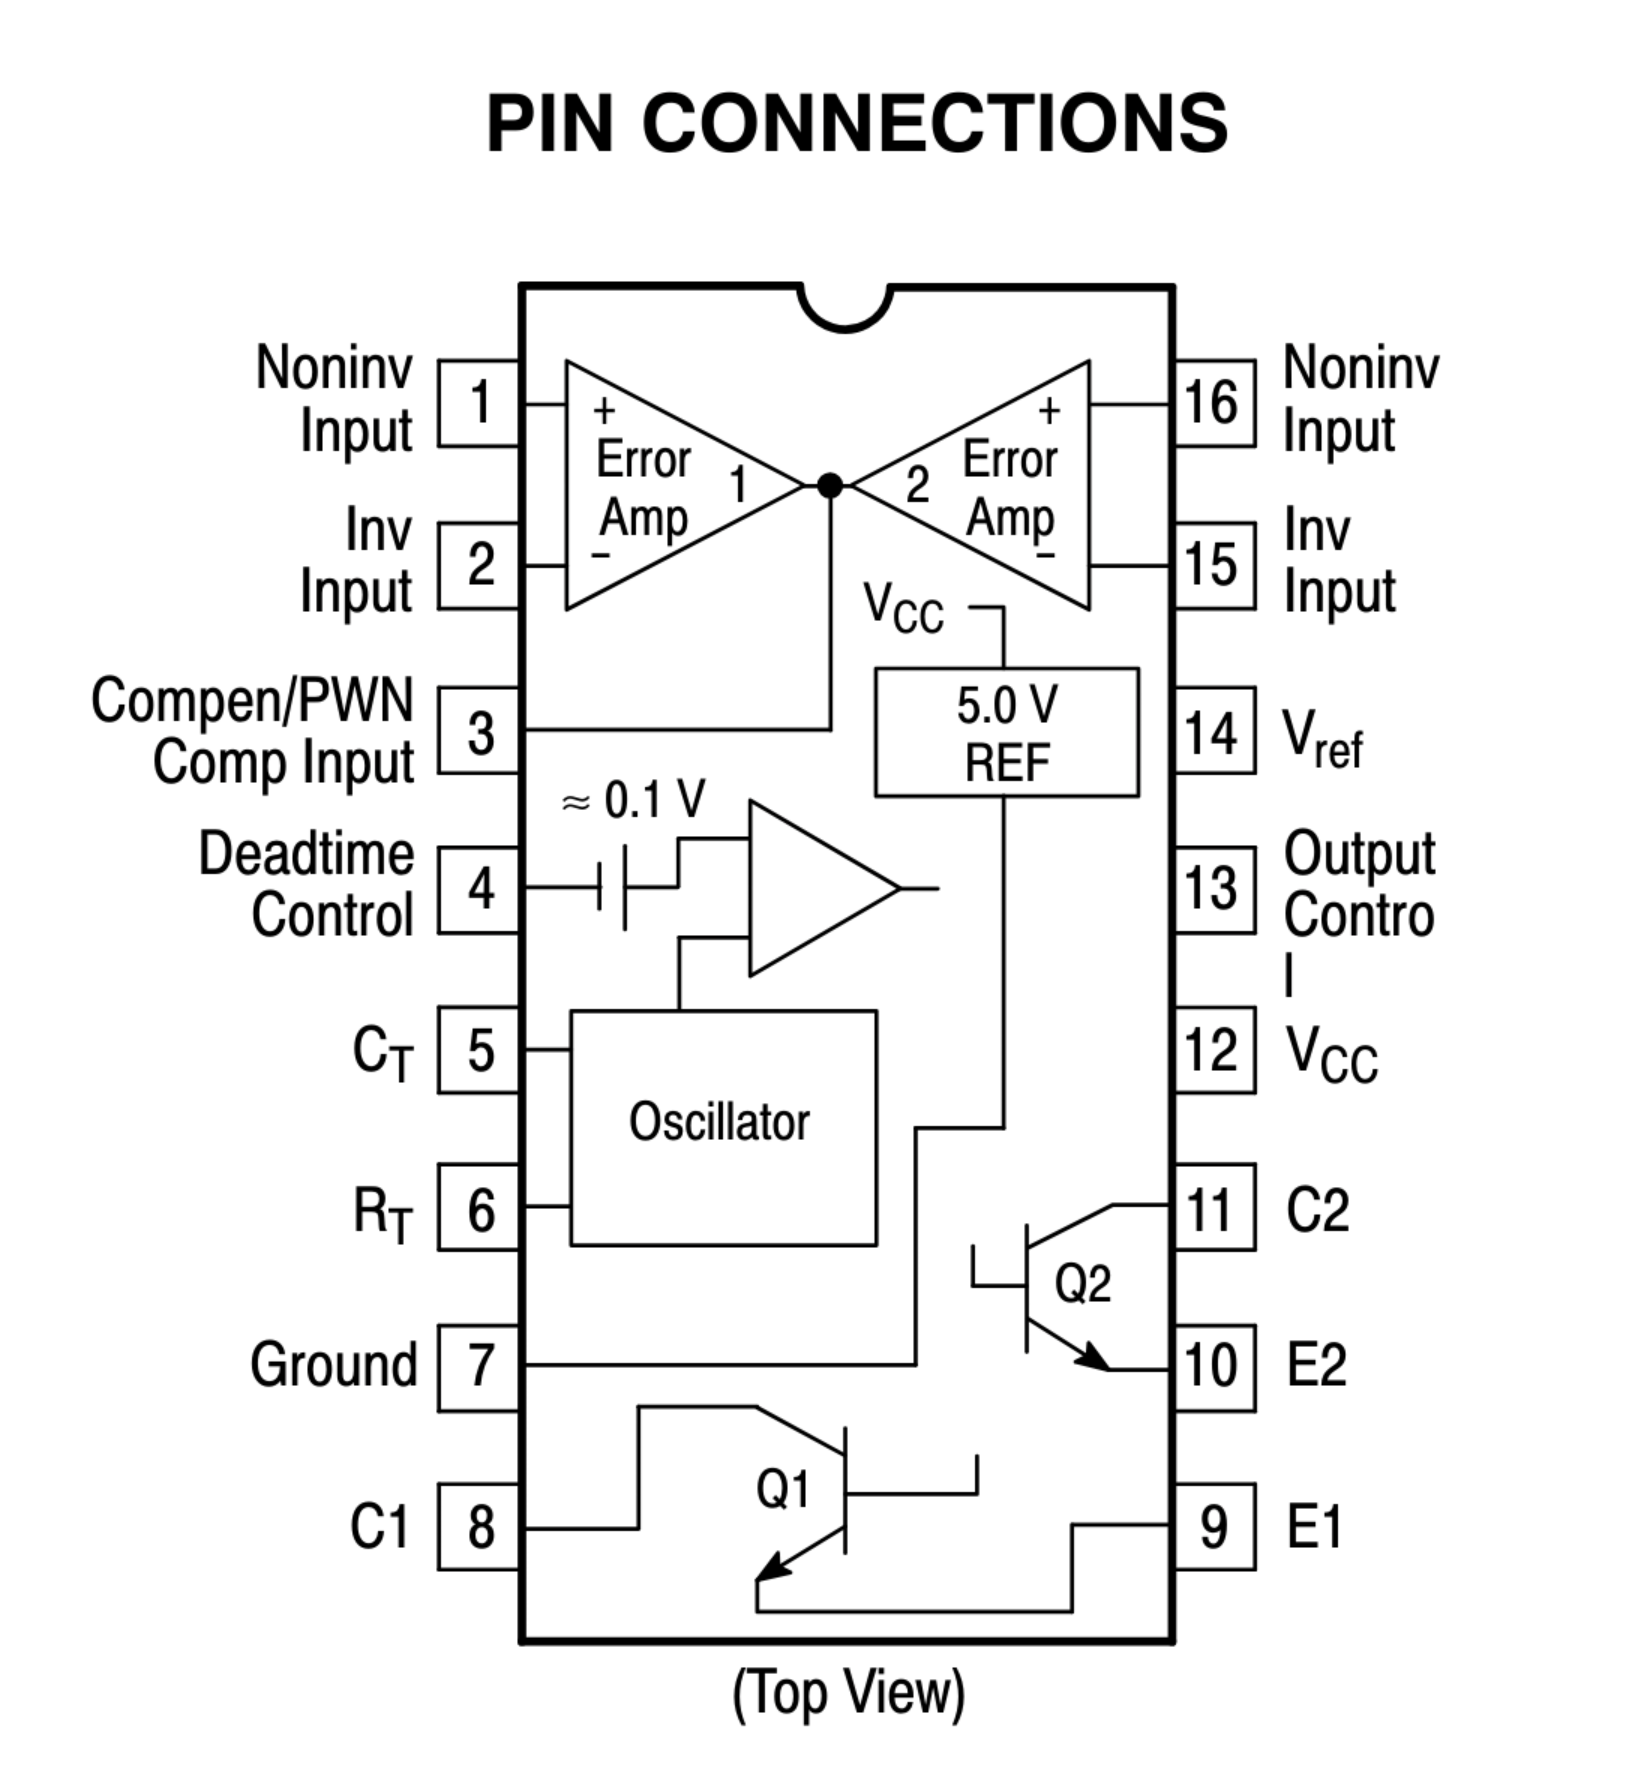
My instinct would be to disable the error amplifiers by connecting pins 1,2,15 and 16 to GND. You can then connect the wiper pin of the potentiometer to the deadtime control input, with the other pins of the potentiometer connected to GND and 3.3 V.
I haven’t worked with this chip before, so take this with a grain of salt. You should probably use a simulation tool to check the circuit before you start destroying chips.
Do you expect every meme to be meticulously handcrafted? It’s a stupid joke, not a work of art.

Close, but the word ends in -le, not -ie. The -le suffix is used as a diminutive form in some German dialects.
If that freehub is constructed like the ones I’ve taken apart before, you’re out of luck. Like you suspected, the teeth lock the rotation of the freehub to the hub, unless the screw in the back is taken out first.
You can try hammering in a (slightly larger) torx key or using an easy-out (probably won’t work if it’s very tight).
As a last resort, you could try to drill out the screw (only so far that the freehub comes off, you don’t want to drill into the hub). Then you should hopefully be left with enough left of screw to grab with a pipe wrench.

My router is called Jupiter, everything connected to it is named after a moon. Callisto, Ganymede, Thelxinoe, Kallichore are what I’m currently using.


IIRC, this is actually done at some point in the books.
You can host a Firefox sync server yourself. You could run that on something like a Raspberry Pi in your local network. If you need remote access, use something like cloudflare tunnels (although I guess that’s something else to be paranoid about).

This seems to be an engineering sample CPU. Since these are pre-production, that could mean it’s basically a fully functional CPU. It could also have serious issues.